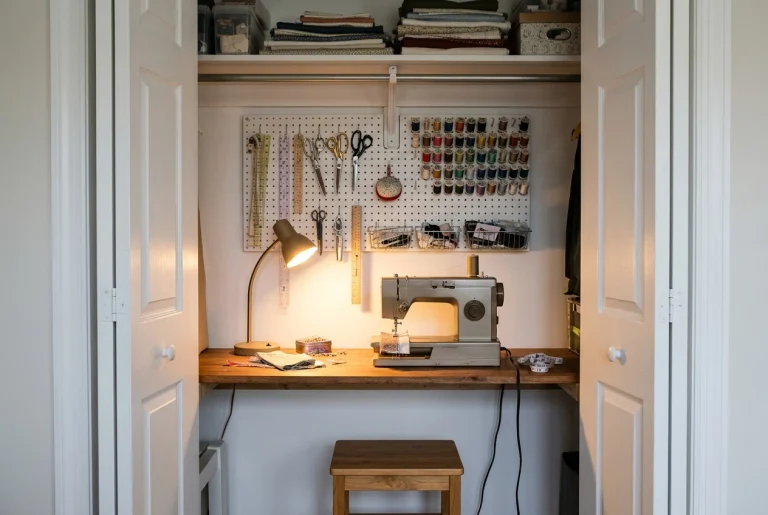

Cutting is the step that stops most small sewing spaces from working. A machine fits on half a desk, an iron sits on a shelf, and a pattern is only paper. But laying out two yards of fabric flat, with room to smooth it and move around it, needs more surface than most corners have.
This article covers how to cut fabric without a cutting table, using seven approaches. Each one suits a different room, and each has a cost in comfort, accuracy or time. Once you know the costs, you can pick the method that fits your space and the project in front of you.
Why cutting is the part that breaks a small sewing space
Sewing happens in a small footprint, since the fabric feeds under the needle a few inches at a time. Cutting is different because the fabric has to lie completely flat and unsupported edges can’t hang off the surface. If a corner of the fabric drops over the edge of a table, its weight pulls the layers out of alignment. Cut along that distorted layout and the pieces will not match the pattern.
Two things make cutting a problem of space and not of skill. The surface has to be bigger than the piece you are cutting, and it has to stay flat and steady while you work. A folded bedsheet over a squishy mattress fails the second test even when it passes the first.
So the question is less “where can I fit a big table?” and more “which part of this job can I do on the surface I already have?” The methods below answer that in different ways.
Cut in smaller pieces: breaking yardage down before you lay it out
The cheapest way to shrink the space you need is to shrink the fabric. Instead of spreading all the yardage at once, divide it into sections and cut one section at a time.
Work this way:
- Check the pattern’s cutting layout and note which pieces go together. A skirt front and back, for example, can be cut separately from a waistband.
- Cut the fabric into rough lengths, one per group of pieces, leaving a few inches of margin around each group.
- Lay out one length at a time, cut its pieces, and set them aside before starting the next.
Keep the grain in mind. Fold the fabric with the selvages together, as the pattern instructs, and keep the lengthwise grain running the way the pattern marks it. If you rough-cut across the width, label each section’s top and bottom so you do not turn a piece sideways later. A small piece of masking tape on the right side works well.
The cost of this method is time and a little extra fabric. You make more passes, and the margins between groups use up some material. If your fabric is a bold print or has a one-way direction, plan the rough cuts so the pattern pieces still face the right way. On very large projects such as curtains or a full-length skirt, a long unbroken piece cannot be divided, so use one of the larger surfaces below for those.
Using the floor, the bed or the dining table without wrecking your back or your fabric
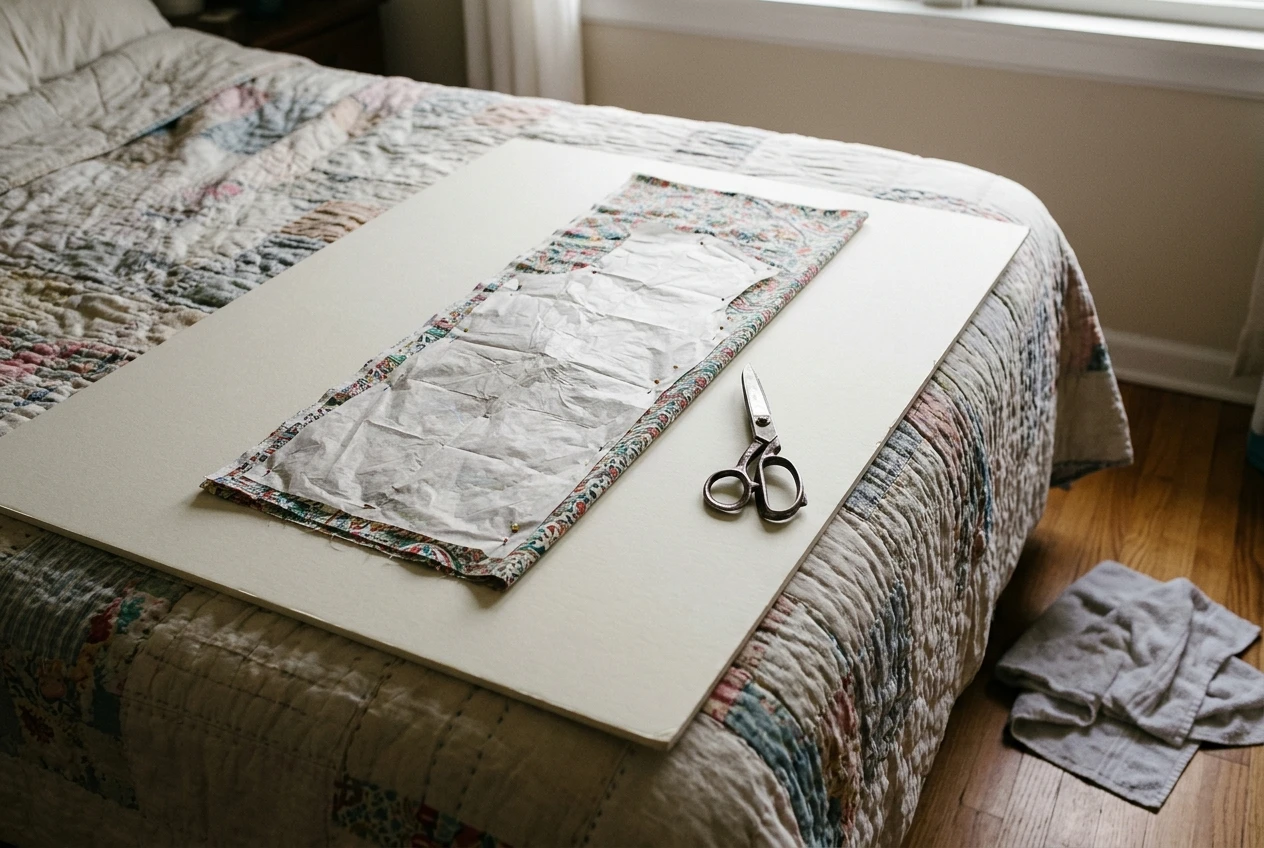
Larger household surfaces are available when you need them, but each has a catch.
The floor
A floor gives you the most flat area for nothing. A hard floor is best because fabric lies evenly and does not sink. On carpet, put a large board, a sheet of cardboard or a flat, smooth sheet under the fabric to avoid an uneven surface.
The cost is your body. Kneeling and bending for twenty minutes is hard on knees and back. A folded towel or yoga mat under your knees helps, and so does taking a break between pattern pieces. Floors also collect pet hair, lint and dust, so wipe or sweep first. If you use a rotary cutter on the floor, put a cutting mat underneath, because the blade will score wood, vinyl and laminate.
The bed
A bed is a sensible size and is at a more comfortable height than the floor, so it is easier on your back. The problem is that a mattress is soft, which makes accurate cutting harder. Scissors with the fabric pinned to the pattern work better on a bed than a rotary cutter does, since the rotary blade pushes down and the mattress gives way beneath it.
A firm board across the mattress, such as a large piece of foamcore or a thin sheet of plywood, improves the surface a lot. Use pattern weights or pins through the pattern and fabric so nothing slides as you cut.
The dining table
If you have a dining table, it is probably the best cutting surface in your home. Protect it with a large self-healing mat or a thick layer of cardboard, particularly if you use a rotary cutter. The costs are setting up and clearing away around mealtimes and the risk of scratches if you skip the protection. A cutting session that has to be packed away before dinner pushes you toward the rough-cut method above, which allows you to stop at any point.
A cutting mat on your lap or a desk: what fits and what doesn’t
A mat on your lap or desk suits small pieces well. Think of bag panels, quilt blocks, strips for binding, a child’s top, or pattern pieces that you have already rough-cut from larger yardage. A typical hobby mat is a fraction of the size of a standard table, so the question is whether the piece you are cutting fits on it.
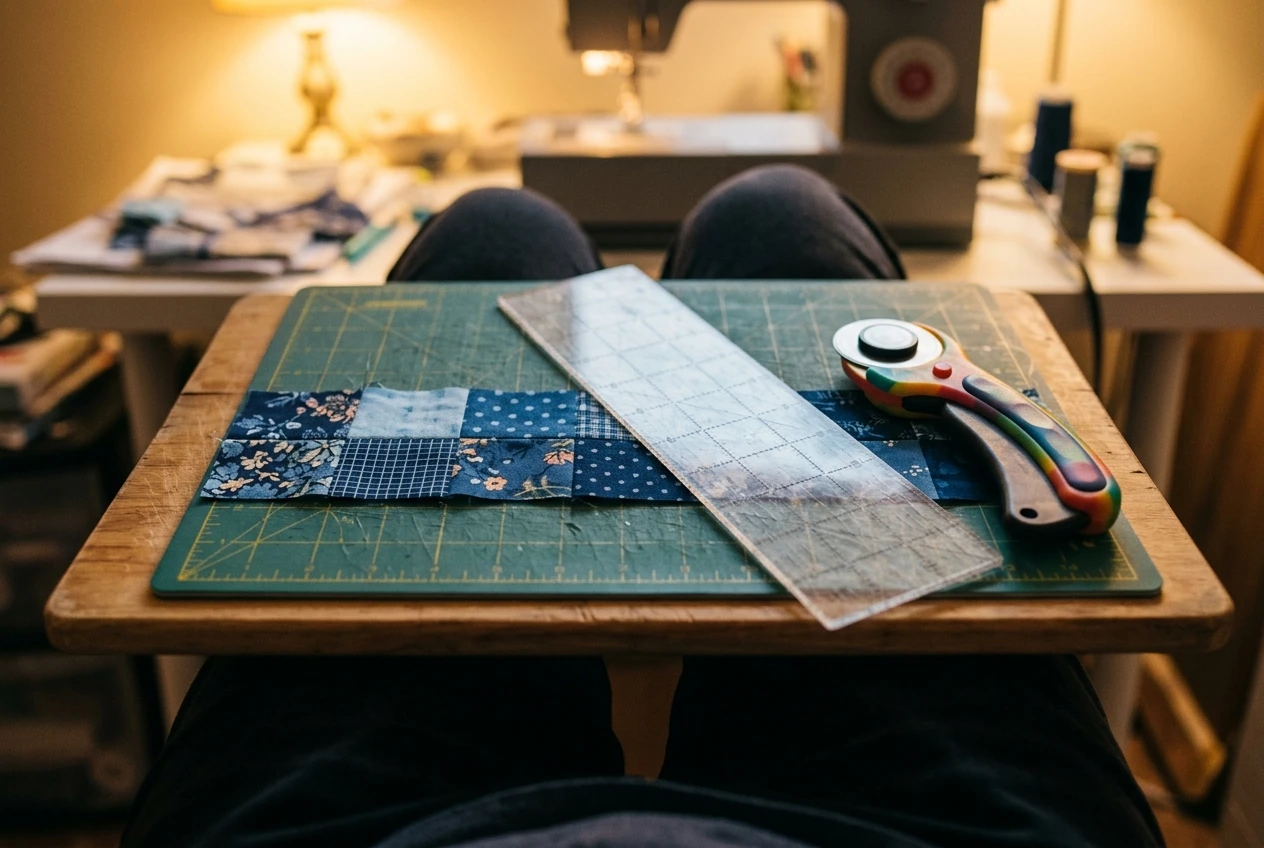
For a lap setup, put a firm board underneath the mat, such as a thin bread board or a lap desk, so the mat does not bend and the cut stays straight. Sit with your forearm over the cutter and push away from your body only with the blade guard behaviour you would use at a table: keep your non-cutting hand behind the ruler, with fingers away from the edge.
What fits well:
- Strips and squares for patchwork
- Small pattern pieces cut from a single layer
- Trimming seams and squaring up blocks
What does not fit:
- Pieces longer than the mat or board, because the fabric overhangs and shifts
- Anything cut from folded yardage, which is bulky and wants a wider surface
- Slippery or stretchy fabrics, which move as soon as the unsupported part drops
Accuracy is good on a mat when the piece sits fully on it. Comfort is the cost: shoulders and neck tire after a long session, so cut in short bursts and put the mat on a desk when you can.
Turning an ironing board or shelf into a temporary cutting surface
An ironing board is already in many sewing corners, and it is the right height for standing work. It is long, which helps with narrow strips and trouser legs, but it is narrow and tapered, and its padded cover is not firm.
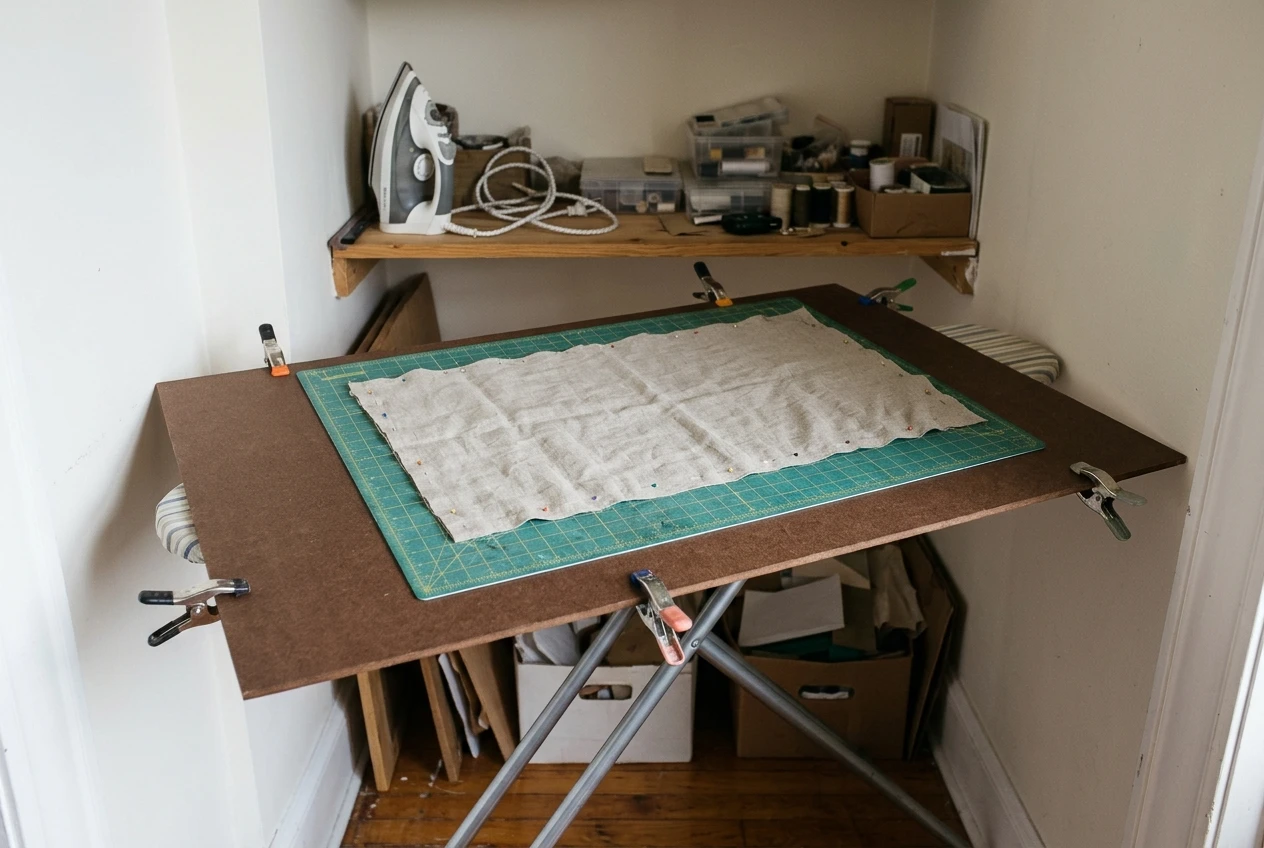
To make it usable, lay a board or a long mat across the top. A flat piece of hardboard, cut to the width of the widest part of the board and fixed with clamps or non-slip shelf liner, gives a firm surface. Pin or weight the fabric, and cut with scissors or a rotary cutter against the mat.
A deep shelf or the top of a chest of drawers can do the same job. Clear it, cover it with a mat, and cut what fits. The limit is width: a surface that is under about two feet deep cannot hold a folded layout. It works well for cutting one length at a time from a rough-cut section, which is why this method pairs so well with the first one in this article.
The cost is stability and capacity. An ironing board wobbles when you press down, so work gently and keep the legs locked. Set it up only for cutting and put it away afterward, which adds a minute or two on each end.
Fold-down and over-the-door surfaces worth considering if you want something permanent
If you cut regularly and have a stretch of wall, a fold-down surface gives you a real table that disappears when you are done. Two kinds suit small rooms:
- A wall-mounted drop-leaf shelf or desk. It attaches to studs or a solid wall, folds flat against it, and opens into a horizontal surface at standing height. Check that the hinges and brackets are rated for the weight of a cutting mat and the pressure of working on it.
- A board that rests across the open door or on hooks over it. Some people lay a wide board across two shelf brackets or hang a hinged panel from the back of a door. These are lighter and cheaper, but they are usually shallower and less rigid.
Think carefully before choosing one. A fold-down surface needs a secure installation, and if you rent, you need permission to drill. It is also only as large as the wall behind it. A shelf that opens to about two feet by four feet handles quilt strips and most single-layer pattern pieces, but folded yardage for a dress will still hang over the edge.
For many people the better plan is to combine this with the rough-cut method: a modest fold-down surface for the final cuts, and the floor or bed only for the rare large project.
Rotary cutter or scissors: which one suits a tight space
Both tools work in a small space, but they ask different things of it.
A rotary cutter needs a mat underneath and a clear stretch for the ruler. It cuts straight lines quickly and precisely, and it cuts several layers at once, which saves time on repeated pieces. Because the fabric stays flat on the mat as you cut, a smaller surface works if the mat is firm. It is not suited to the bed, to carpet or to unprotected tables.
Scissors or shears can go on almost any surface, including a board on the bed. Bent-handled shears keep the lower blade flat against the surface, so the fabric is not lifted as you cut. Scissors are the better choice for curves, for cutting around pattern pieces, and for places where you cannot fit a mat. They are slower on long straight lines, and they take more hand strength through thick fabric.
Many sewers use both: a rotary cutter and ruler for straight edges on the mat, and shears for curves and notches. If you only buy one item, choose based on your space and your projects. Mostly garments cut from patterns suit shears. Mostly patchwork and straight-edge projects suit a rotary cutter with a mat, and a medium blade size handles the widest range of fabric.
Keeping cutting tools and mats stored flat and out of the way
Mats are the awkward item to store. They warp when bent, left in a hot place, or stored in direct sun, and a warped mat makes it difficult to cut a straight line. Flat storage is best:
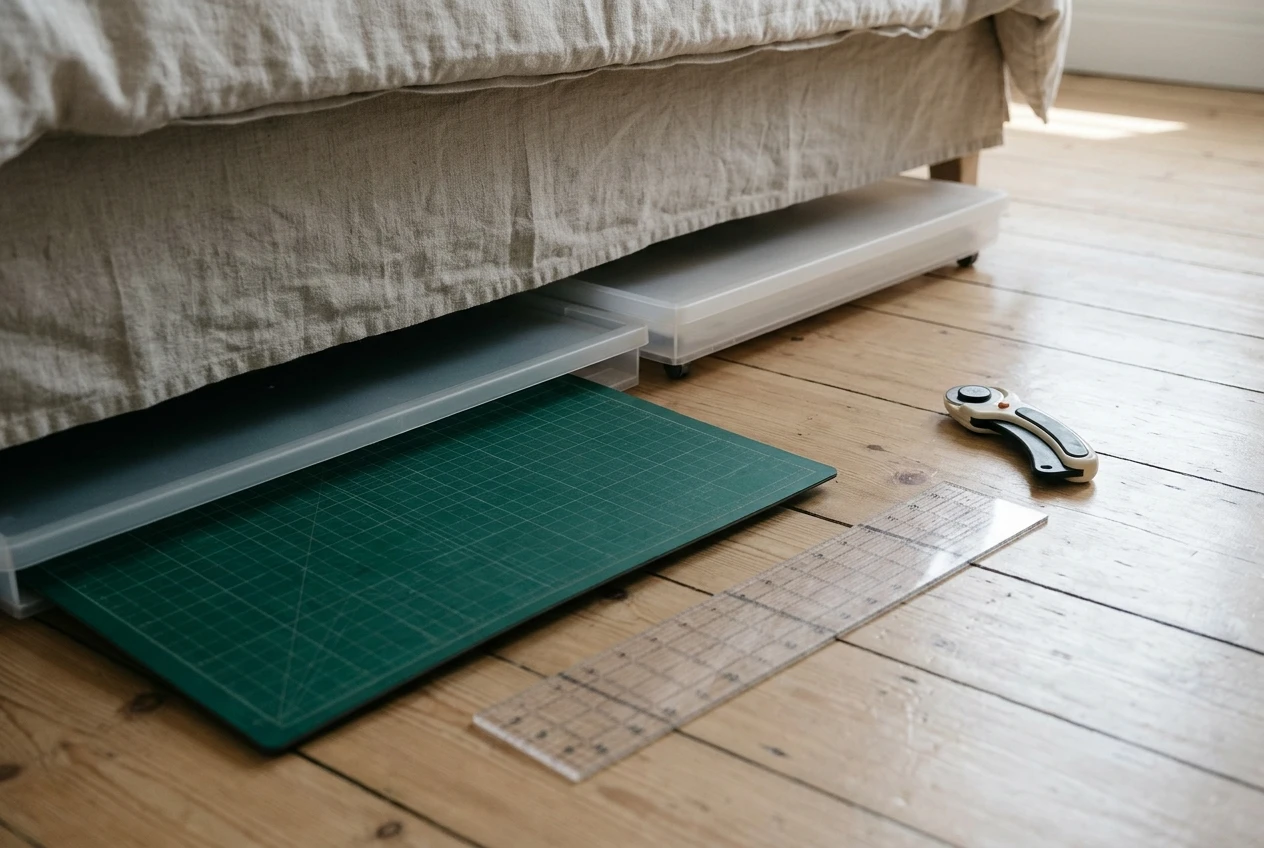
- Slide the mat under a bed or sofa in a flat storage box.
- Keep it behind a wardrobe, a bookshelf or a dresser, standing on its long edge against the wall with a board in front for support.
- Tuck it into the gap between a cupboard and a wall if there is one.
- If you use a fold-down surface, store the mat under it or on the back of the door.
Rulers can go flat with the mat. Rotary cutters should always be closed and stored with the blade guard on, out of reach of children and pets. Scissors and shears can hang on hooks or sit in a drawer, kept away from the household’s other scissors so that the fabric pair does not end up cutting paper.
Mats are available in several sizes, and the largest one you can store flat is usually the most useful. Choose the size by your storage space as well as your cutting surface.
Picking your method: a quick way to match it to your room and your projects
Start with what you sew most, then match it to the space you have.
- Mostly small projects, a desk and no spare floor: a lap or desk mat and rough-cut sections.
- Mostly garments, a bed and little else: a firm board on the bed, scissors, and the rough-cut method for long lengths.
- A dining table you can borrow: a large mat on the table for big jobs, with the smaller methods for quick work between meals.
- Standing-height work in a narrow room: an ironing board or shelf with a board and mat on top.
- A regular sewing habit and wall space: a fold-down surface, with floor or bed as the backup for large pieces.
Whatever you choose, the pattern is the same: cut the fabric down to a size your surface can hold, protect the surface, and pick the tool that suits it. If you are planning the rest of your corner as well, the guide on fitting a real sewing setup into a corner, a closet, or half a desk covers where the machine, the iron and storage can go once you know how you will cut.
When you choose a cutting mat, rotary cutter or flat storage box, match each one to the method you picked above: a mat sized to the board or shelf you will use, a medium-sized rotary cutter with a retractable blade guard, and flat storage that fits under your bed or behind a piece of furniture.