

Every sewing space, however small, has to do three jobs: sewing, cutting, and pressing. A dedicated sewing room does all three at once, with a table for cutting, an ironing board that stays up, and a machine that never moves. In a corner, a closet, or half a desk, you have to decide which jobs get a permanent spot and which ones borrow space.
These small space sewing setup ideas cover three layouts: the closet, the shared desk, and the living room corner. Each one keeps something and gives something up. Read all three, pick the one closest to your home, and you will know what to set up first.
Start with the three jobs your space has to do
Sewing needs a stable surface, a chair at a comfortable height, and room for the fabric to travel. Fabric drags if it has nowhere to go. A machine pushed against a wall with no surface to its left or behind it will pull your seams off course.
Cutting needs the largest flat area of the three. You are laying out pattern pieces or yardage, so the surface has to be flat and big enough to hold the piece you are cutting. This is the job that small spaces handle worst, and the one most worth planning for.
Pressing needs a heat-safe surface and an iron within a step or two of your machine. Pressing seams as you go is what separates flat, crisp seams from puckered ones, so a setup that makes pressing a chore will quietly make your sewing worse.
Before you choose a layout, write down which of the three jobs your space can host all the time and which ones will have to be set up and put away. Most small setups end up with sewing permanent, cutting temporary, and pressing somewhere in between. That split is normal and workable.
The closet sewing nook: what fits, and how to close it up at the end of the night
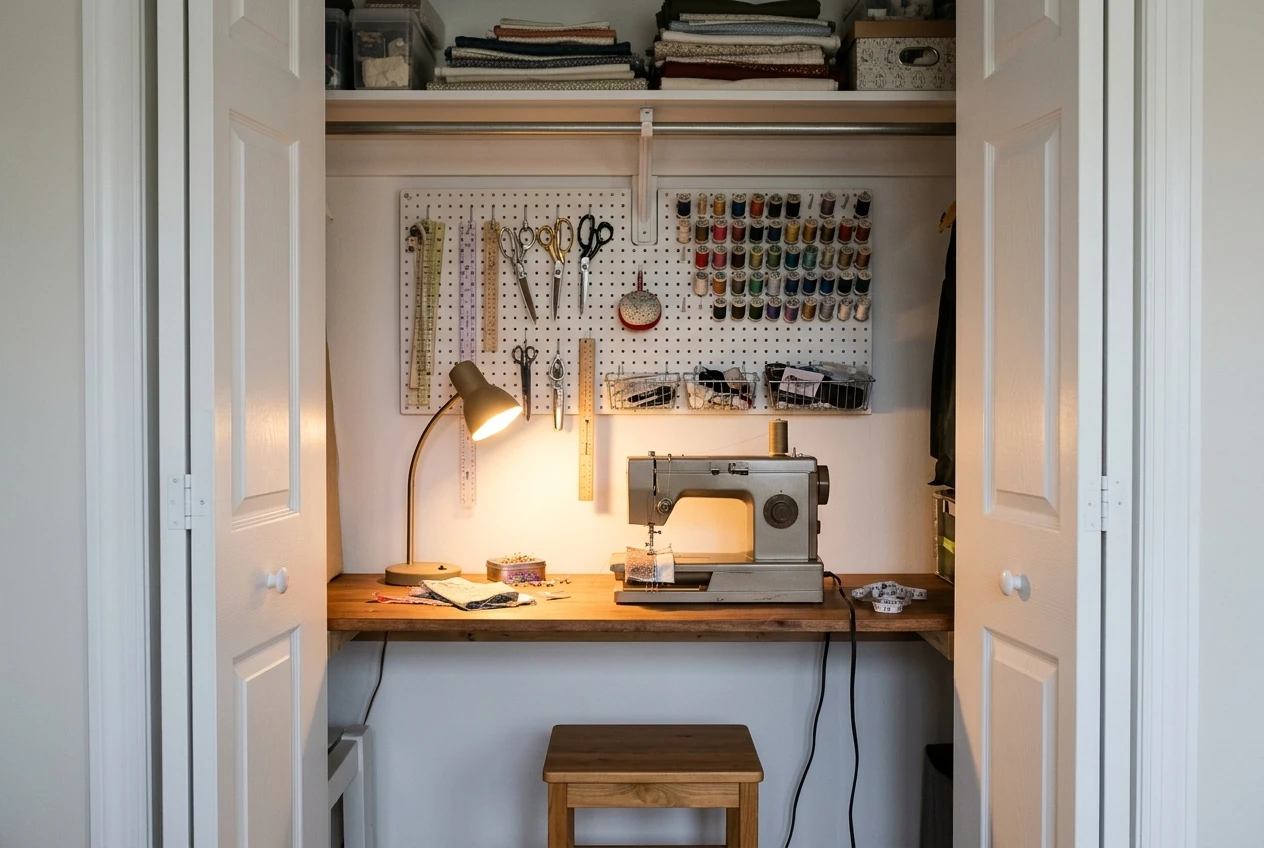
A closet with the doors removed or folded open is the closest thing to a sewing room in a small home. It has walls on three sides, which gives you something to hang storage on, and a door that can hide the whole thing when you are done.
What it keeps
- A permanent machine position. The machine can stay out, threaded and ready, so starting a project takes seconds.
- Wall space for storage. The back and side walls hold shelves, pegboard, or hooks for scissors, rulers, and thread.
- A hidden mess. Pull the door shut and unfinished projects disappear.
What it gives up
- Cutting room. A closet is rarely wide enough to lay out fabric, so cutting happens elsewhere, on a bed, a dining table, or the floor over a mat.
- Airflow and light. A closet can get warm and dim, so plan for a good lamp and leave the door open while you work.
- Elbow space. Measure the width and depth before you buy anything. You need room for the machine, your arms, and the chair or stool you sit on.
Setting it up
The foundation is a shelf or narrow desk at sewing height across the closet. Use the wall space above it for vertical storage. Put the machine in the middle so you can reach both sides, and keep the iron on a shelf or small stand within reach.
To close up at the end of the night, make the last five minutes a routine. Put loose pins in a magnetic dish or pincushion, set the iron to cool somewhere safe, clip any thread ends, and drape a cover over the machine. Unplug the iron and lamp before you shut the door. A closet is a tight space for heat, so never close it on a hot iron.
The shared desk setup: a machine that comes out and goes away without a fuss
If your only available surface is half a desk or a shared table, the machine has to be portable in practice, not just in the marketing. The goal is a routine where setup and takedown each take a couple of minutes.
Make the machine easy to move
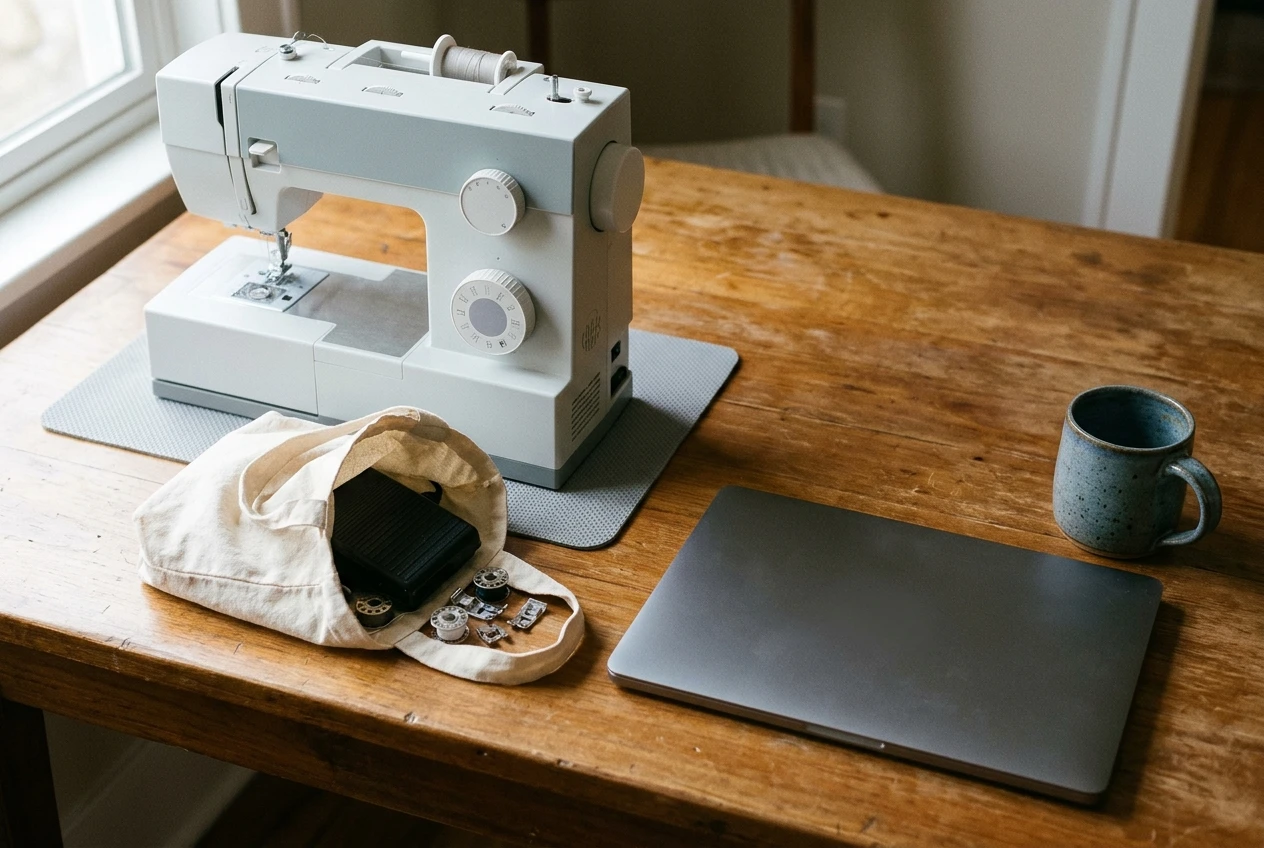
Keep the machine in a carrying case or under a fitted cover, and store it somewhere you can reach without moving other things: a shelf under the desk, the bottom of a bookcase, or a nearby cabinet. If the machine is heavy enough that lifting it feels like an effort, you will sew less. Think about that before you commit to a model, especially if you are choosing a machine for a small space. A lighter machine is easier to take out and put away.
Keep a small tote or bin beside the machine with everything it needs: foot pedal, power cord, bobbins, needles, seam ripper, and the presser feet you use most. When you sit down, you lift out the machine, plug in the cord, and start.
Protect the shared surface
A desk was not built for a vibrating machine. A thin rubber mat or a non-slip pad under the machine reduces creep and protects the finish. A sewing machine can also hurt a wood surface if it slides, so a mat is worth having.
Share the space without a fight
If someone else uses the desk, agree on a handoff. A tray or bin that holds your current project lets you clear the surface in under a minute. Leave the project in the tray, put the machine away, and the desk is theirs again.
What you give up here is spontaneity. You cannot sew for ten minutes between other tasks, because setup takes a while. What you keep is a full-size machine without a dedicated room.
The living room corner: keeping it tidy enough to live beside
A corner of the living room works well when you have the floor space but not a separate room. The difficulty is that it is visible all the time, so how it looks matters as much as how it works.
Choose furniture that does two jobs
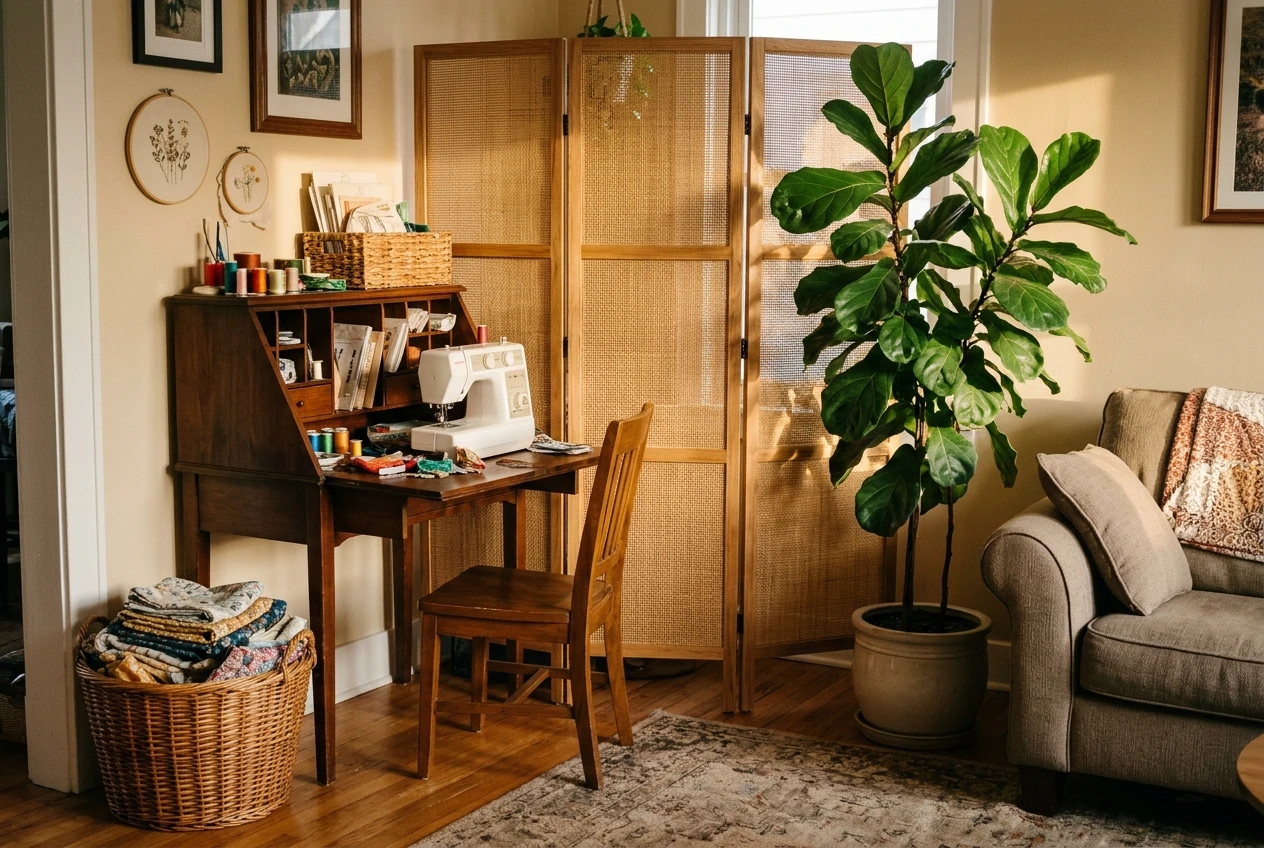
A small console table, a secretary desk, or a cabinet with a fold-down front can hold a machine and look like part of the room. When the lid is closed, the room looks like a living room. A bookcase beside the table holds fabric in baskets or bins, so projects stay out of sight.
If you cannot buy new furniture, a rolling cart holds the machine and tools and can be pushed against a wall when you are finished. A cart also lets you move the setup closer to a window when you want daylight.
Keep a visual boundary
Use a rug, a folding screen, or a tall plant to mark where the sewing area starts. A boundary makes the corner feel like a deliberate part of the room and keeps scraps and thread from drifting across the floor.
Manage the threads
Thread and fabric scraps travel. Put a small bin or fabric bag within reach of your chair for trimmings and clip it to the table edge if you can. A handheld lint brush or a small vacuum nearby makes the end-of-session cleanup quick.
What you give up in this layout is privacy and a place to leave a project half-finished for days. What you keep is room to sit comfortably and sew in company.
Cutting and pressing without a big table: fold-down, lap, and tabletop options
Cutting and pressing are the jobs most likely to push a small setup past its limits. These options handle them without taking over the room.
Cutting options
- Fold-down wall table. A hinged shelf mounted to the wall gives you a flat surface when you need it and folds flat when you do not. It works best in a closet or a corner, but it needs a wall that can support it, so use proper anchors.
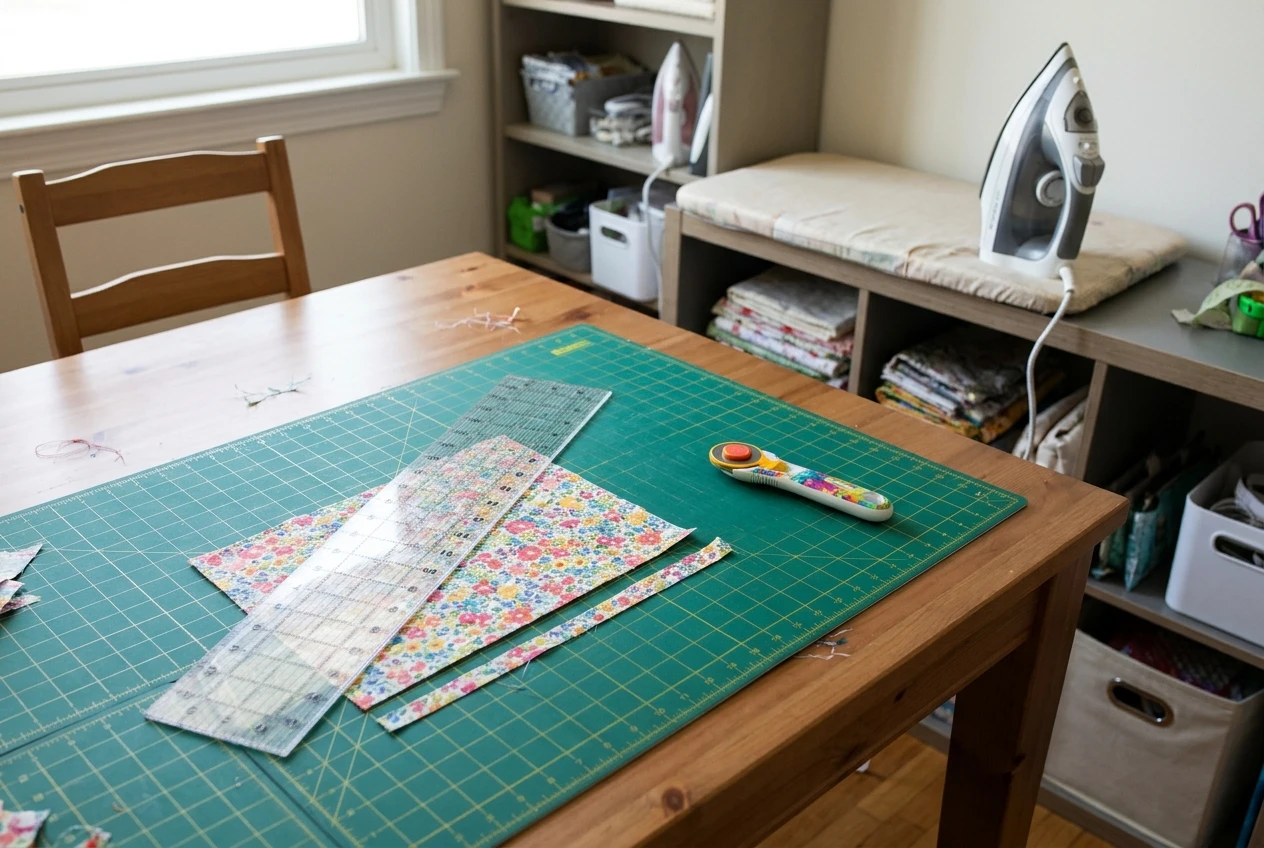
- A cutting mat on a bed or dining table. A self-healing cutting mat protects the surface under a rotary cutter. Lay it on a bed, a dining table, or a folding table, cut, then roll or slide it away. Many sewers use this and need nothing else.
- A tabletop cutting board. A folding cardboard or foam board that sits on any table gives you a gridded surface and stores flat behind a door or bookcase.
- The floor. Cutting on a hard floor over a mat is easy on the fabric and free, though hard on your knees. Use it for large pieces only.
Cut in sections when you can. Cut one pattern piece at a time rather than laying out a whole garment, so the surface can be small.
Pressing options
- A tabletop pressing board. A small padded board sits on a desk or table and stores in a drawer. It handles most seam pressing for small projects.
- A wool pressing mat. A thick wool mat on a table gives a heat-safe surface and holds heat well, which helps seams lie flat.
- A over-the-door ironing board. These hang on the back of a door and take up almost no floor space. They are good for closets and shared rooms.
- A full-size board. If you are making garments with long seams, a full-size ironing board folded behind a door or beside a cabinet is still worth the space.
Whichever you choose, keep the iron within a few steps of the machine and make sure the cord reaches without crossing a walkway.
Storage that works vertically: walls, carts, and what to keep within arm’s reach
Floor and surface space are limited, but wall space is not. Go up first.
Use the walls
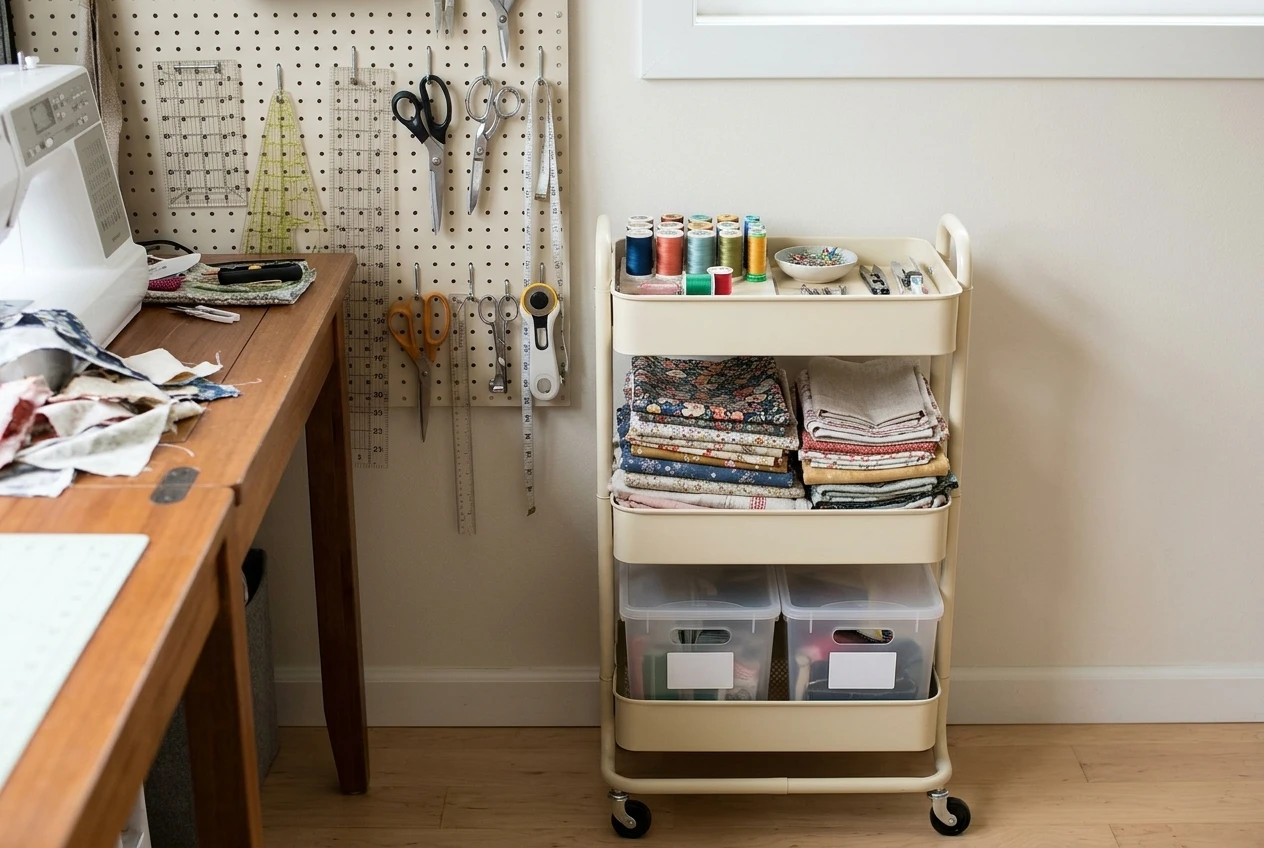
- Pegboard. A pegboard panel holds scissors, rulers, and spools on hooks and small baskets, and you can rearrange it as your tools change.
- Wall shelves. A few narrow shelves hold fabric bins, pattern envelopes, and notions boxes.
- Hanging rails. A small rail holds hooks for rulers, templates, and measuring tapes.
- Over-the-door organizers. A hanging pocket organizer on the back of a door holds thread, bobbins, and small notions.
Use a cart
A narrow rolling cart with three tiers can serve as storage and a movable work surface. Keep the tools you use every session on the top shelf, fabrics for the current project in the middle, and bulky items on the bottom. A cart also lets you roll everything into a closet at the end of the night.
Decide what lives within arm’s reach
Arm’s reach is a small zone, so use it only for items you touch every session:
- Scissors and thread snips
- Pins or clips in a dish
- Seam ripper
- Measuring tape
- Bobbins and the thread you are using
Everything else, such as specialty feet, interfacing, and extra fabric, can sit one step away on a shelf or in the cart. If you find yourself getting up often for the same item, move it closer.
Clear containers and labels save time. When you can see what is in a bin, you do not have to open every one.
Lighting and comfort in a tight spot, so you can sew for longer than twenty minutes
A cramped, dim, awkward setup will end your session early. Two changes make the biggest difference: light and seating.
Light
Most machines have a small built-in light that is not enough on its own. Add an adjustable task lamp that you can aim at the needle area and the fabric to the left of it. Place it so your hand does not cast a shadow over the needle. If you can, put the setup near a window for daytime sewing and use the lamp to fill in.
For closets and corners, a clip-on or stick-on LED light under a shelf gives even light across the work surface. Choose a bulb labeled for daylight or a neutral white so colors look true when you match thread to fabric.
Seating and posture
Your chair height matters more than the chair itself. When you sit, your forearms should rest roughly level with the machine bed and your feet should sit flat on the floor or a footrest. If the table is too high, raise the chair and add a footrest. If it is too low, a firm cushion or a table riser helps.
A stool without a back is fine for short sessions, but a chair with some back support lets you sew longer. If you are in a closet, an adjustable stool that slides out of the way is practical.
Small comforts
- A mat under your feet if you are on a hard floor
- A way to stand and stretch, such as a timer or a natural stopping point after each seam or block
- Ventilation, especially in a closet, with the door open and a fan if the space warms up
Short, comfortable sessions add up to more finished projects than rare marathon ones.
Choosing your layout and setting up in one afternoon
Choose by looking at what your space already offers.
- Choose the closet if you have a closet you can spare and want a machine that stays set up. Plan to cut elsewhere.
- Choose the shared desk if you have no dedicated spot and need to share a surface. Prioritize a lighter machine and a quick-grab tote.
- Choose the living room corner if you have floor space and want to sew in company. Prioritize furniture that looks good closed up and a cart you can move.
Then set up in this order, which takes an afternoon:
- Measure and clear the spot. Know the width, depth, and height you have before you buy anything.
- Place the machine and chair. Sit down, check your posture, and adjust the height until your arms and feet are comfortable.
- Add light. Put a task lamp where it lights the needle area without shadows.
- Set up one cutting surface. A mat on a table or a fold-down shelf is enough to start.
- Place the iron and a pressing surface within a few steps.
- Add storage last. Once you have sewn a few projects, you will see which tools you reach for most, and you can build the wall and cart storage around that.
Leaving storage until the end avoids buying organizers for tools you do not use. If you are choosing a machine, tools, or storage as part of the setup, compare options for your specific space before you buy, since size and weight matter more in a small footprint.
Pick the layout closest to your space, set up just the machine and one cutting surface this week, and save this guide to your Pinterest board so you can come back when you add storage.